How to Stabilize Shaky Video Footage in CapCut: Step-by-Step Tutorial

Whether you're filming travel videos, building cinematic edits, or simply trying to clean up your latest vlog, shaky footage can quickly pull your viewer out of the moment. CapCut’s Desktop Video Editor includes an intelligent, easy-to-use stabilization tool that can smooth out jittery clips in just a few clicks - no complicated learning curve or expensive software required.
CapCut’s interface is sleek, intuitive, and packed with powerful tools that go far beyond basic editing. With built-in AI that enhances everything from motion to sound, it’s become a go-to for creators across every level. While most people know it for trimming and filters, the platform also utilizes advanced AI to clean up blur, shake, and background noise - all without requiring you to switch between apps. Combine it with CapCut’s AI voice generator or video upscaler, and you can create fully polished edits without leaving your desktop.
Read on for exactly how to stabilize your footage with CapCut Desktop - and how to get your videos looking clean, smooth, and ready to share.
Need suggestions on camera gear? Read my full breakdown for every budget here.
CapCut Stabilization Tool Overview
CapCut’s stabilization filter is simple but surprisingly advanced. Here’s what makes it stand out:
- Smart AI-powered correction that handles most camera shake automatically
- Adjustable smoothing levels depending on how rough your clip is
- Real-time previews so you can see exactly what’s changing
- Non-destructive editing that keeps your original footage untouched
If you’ve ever dealt with handheld jitters or unsteady drone pans, this tool can clean your footage up in seconds.
How to Stabilize Shaky Video in CapCut Desktop
Step 1: Import Your Footage
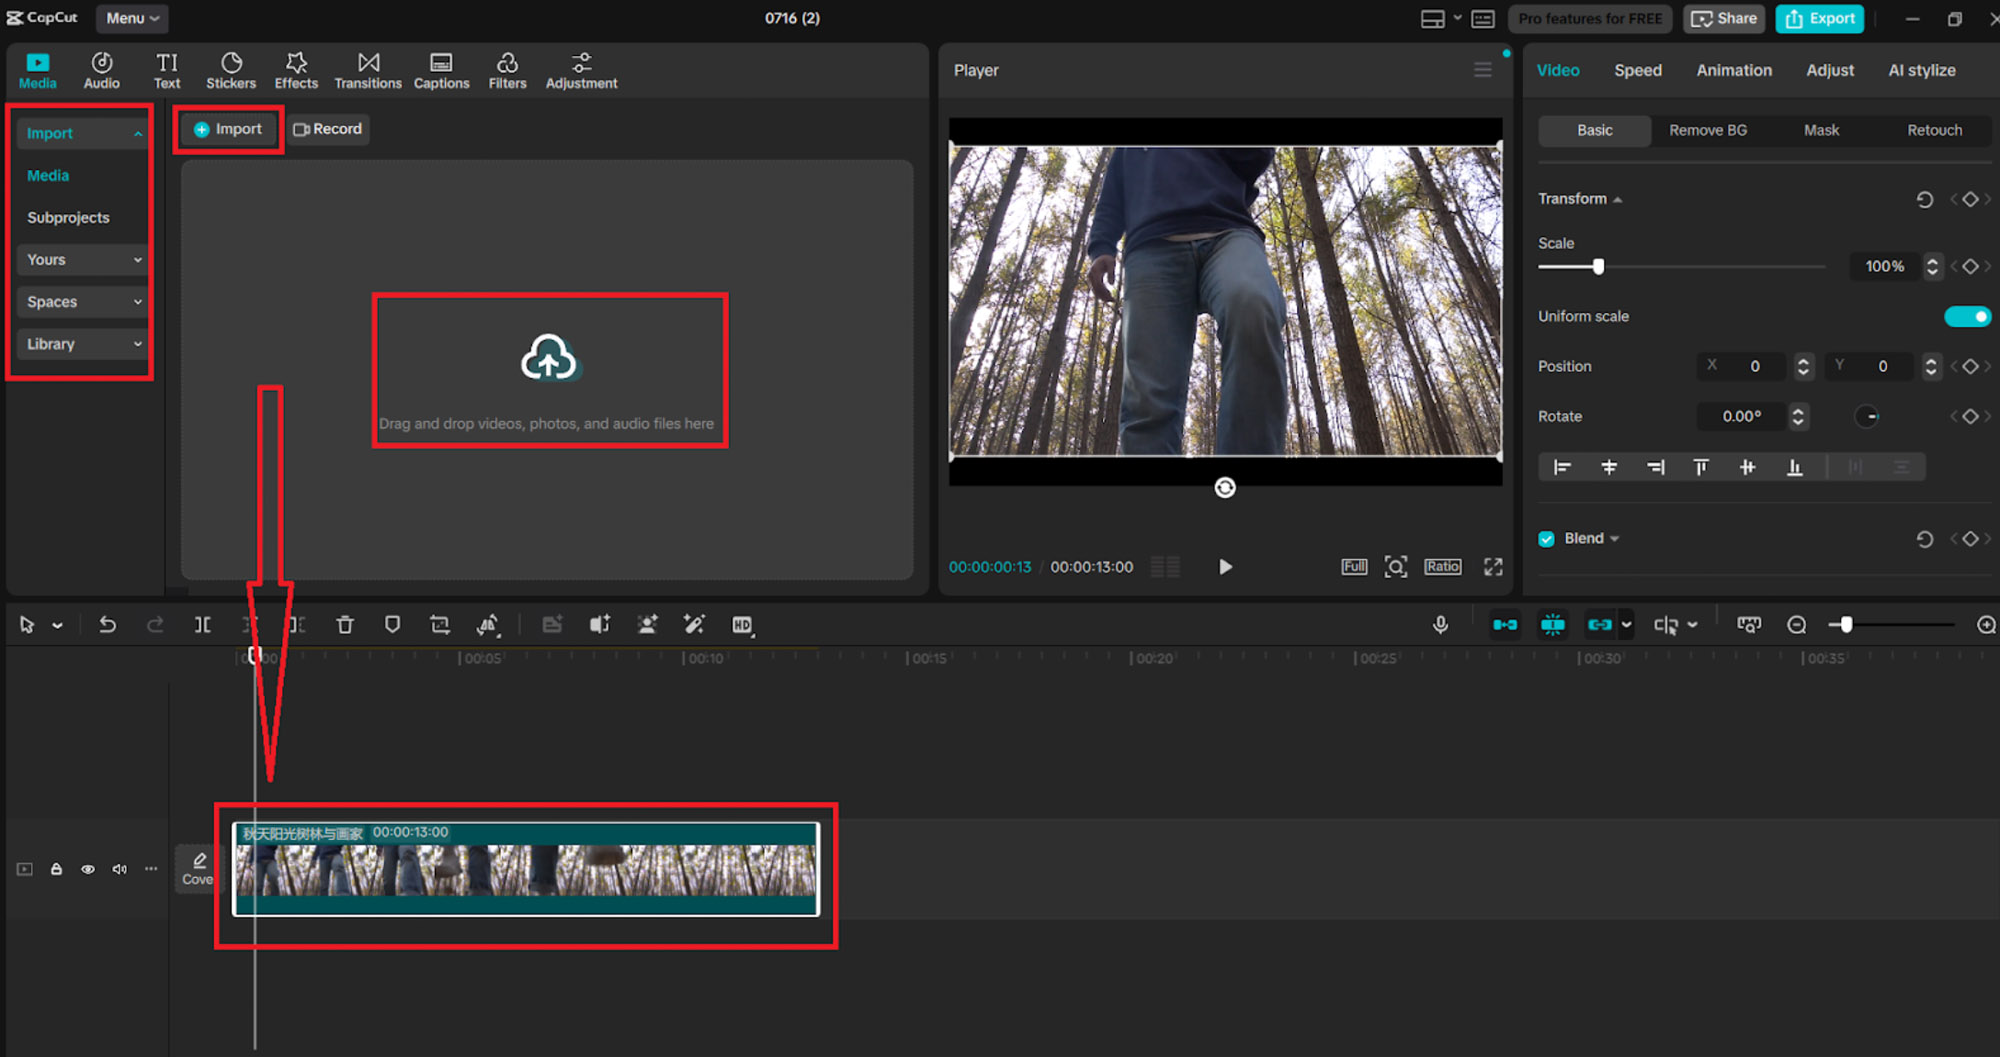
Launch CapCut Desktop, start a new project, and head to the Media tab. Click + Import to load your clip, then drag it to the timeline so it’s ready to edit.
Step 2: Locate the Stabilization Tool
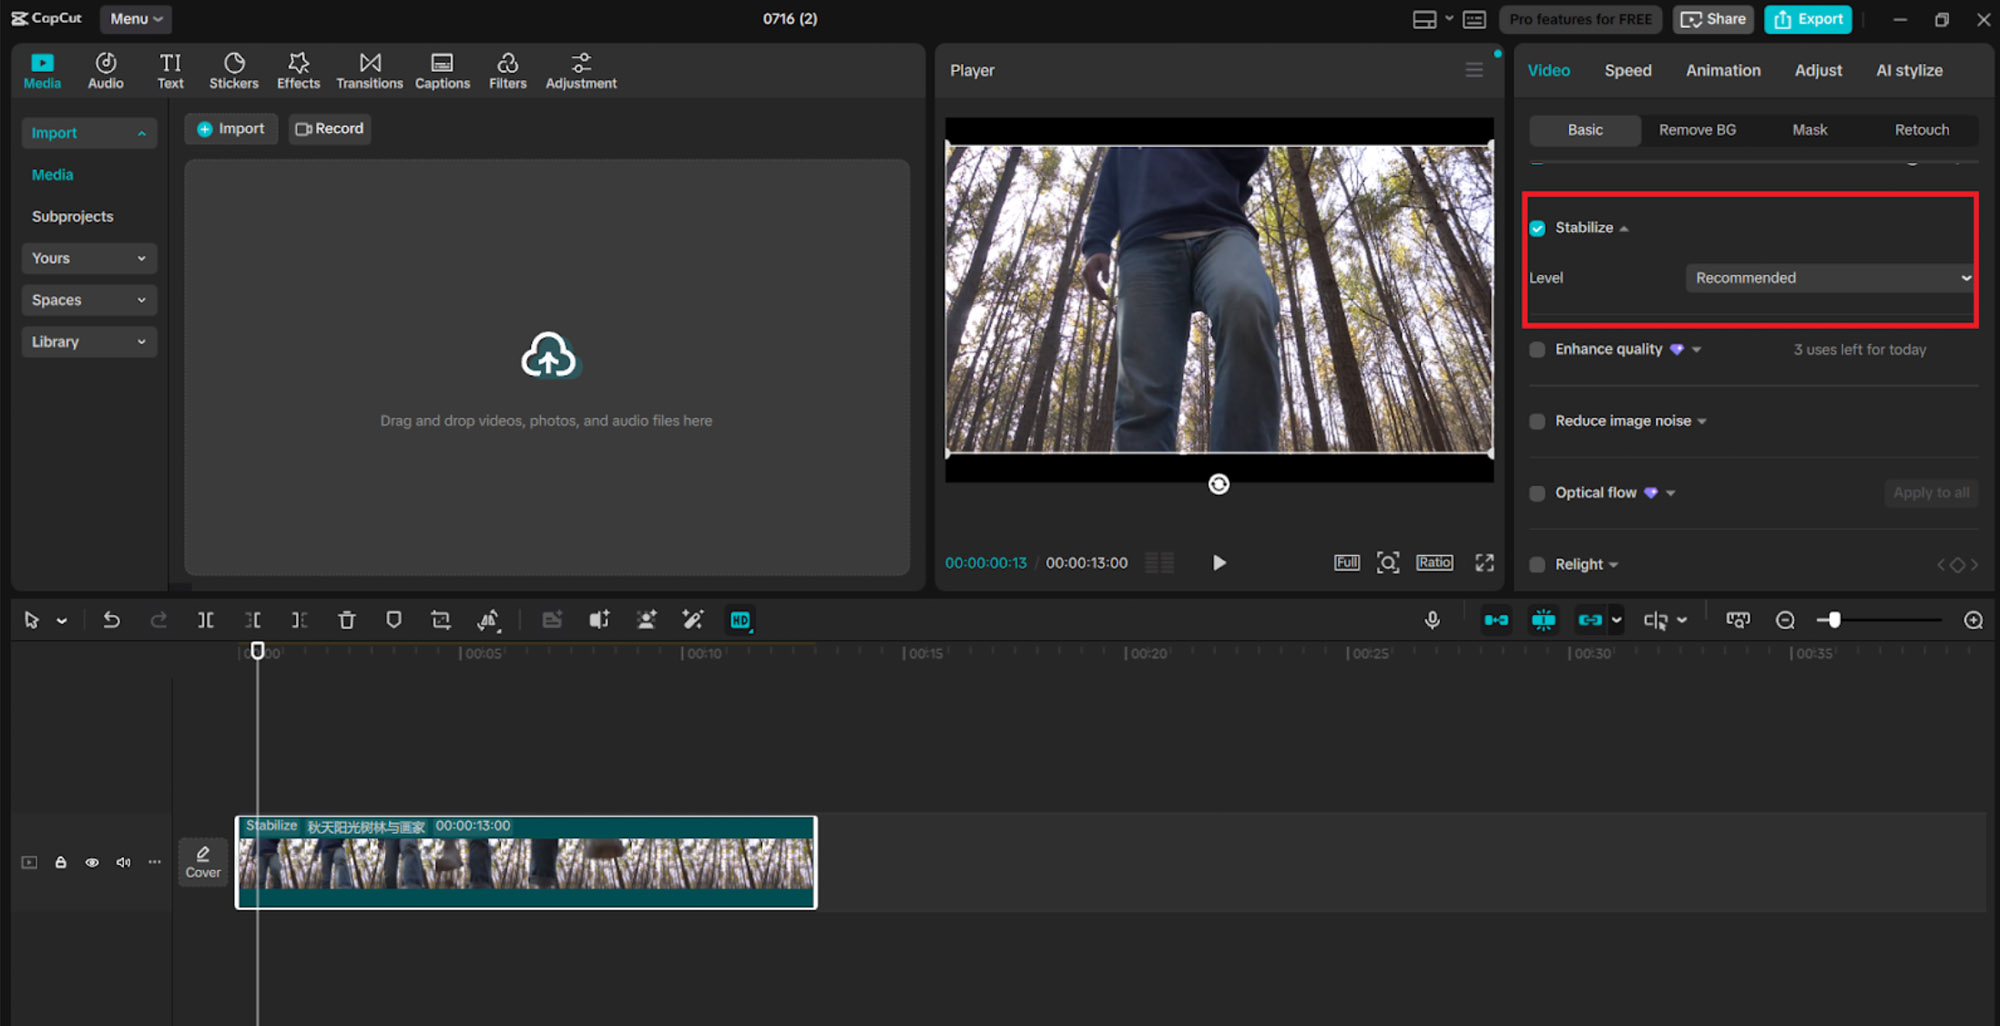
With your clip selected, look to the Properties panel on the right. Scroll down to find the Stabilize option and toggle it on. This triggers the software’s built-in AI to start smoothing out motion.
Step 3: Let CapCut Analyze the Video
Once stabilization is enabled, CapCut will automatically begin analyzing your clip. A progress bar will appear as it detects motion and corrects for it in real time. This typically takes a few seconds, though longer clips may take slightly more processing time.
If your video is also blurry or low-resolution, use CapCut’s AI Video Upscaler before or after stabilization to sharpen the image further and create a more professional-looking final result.
Step 4: Choose Your Stabilization Level
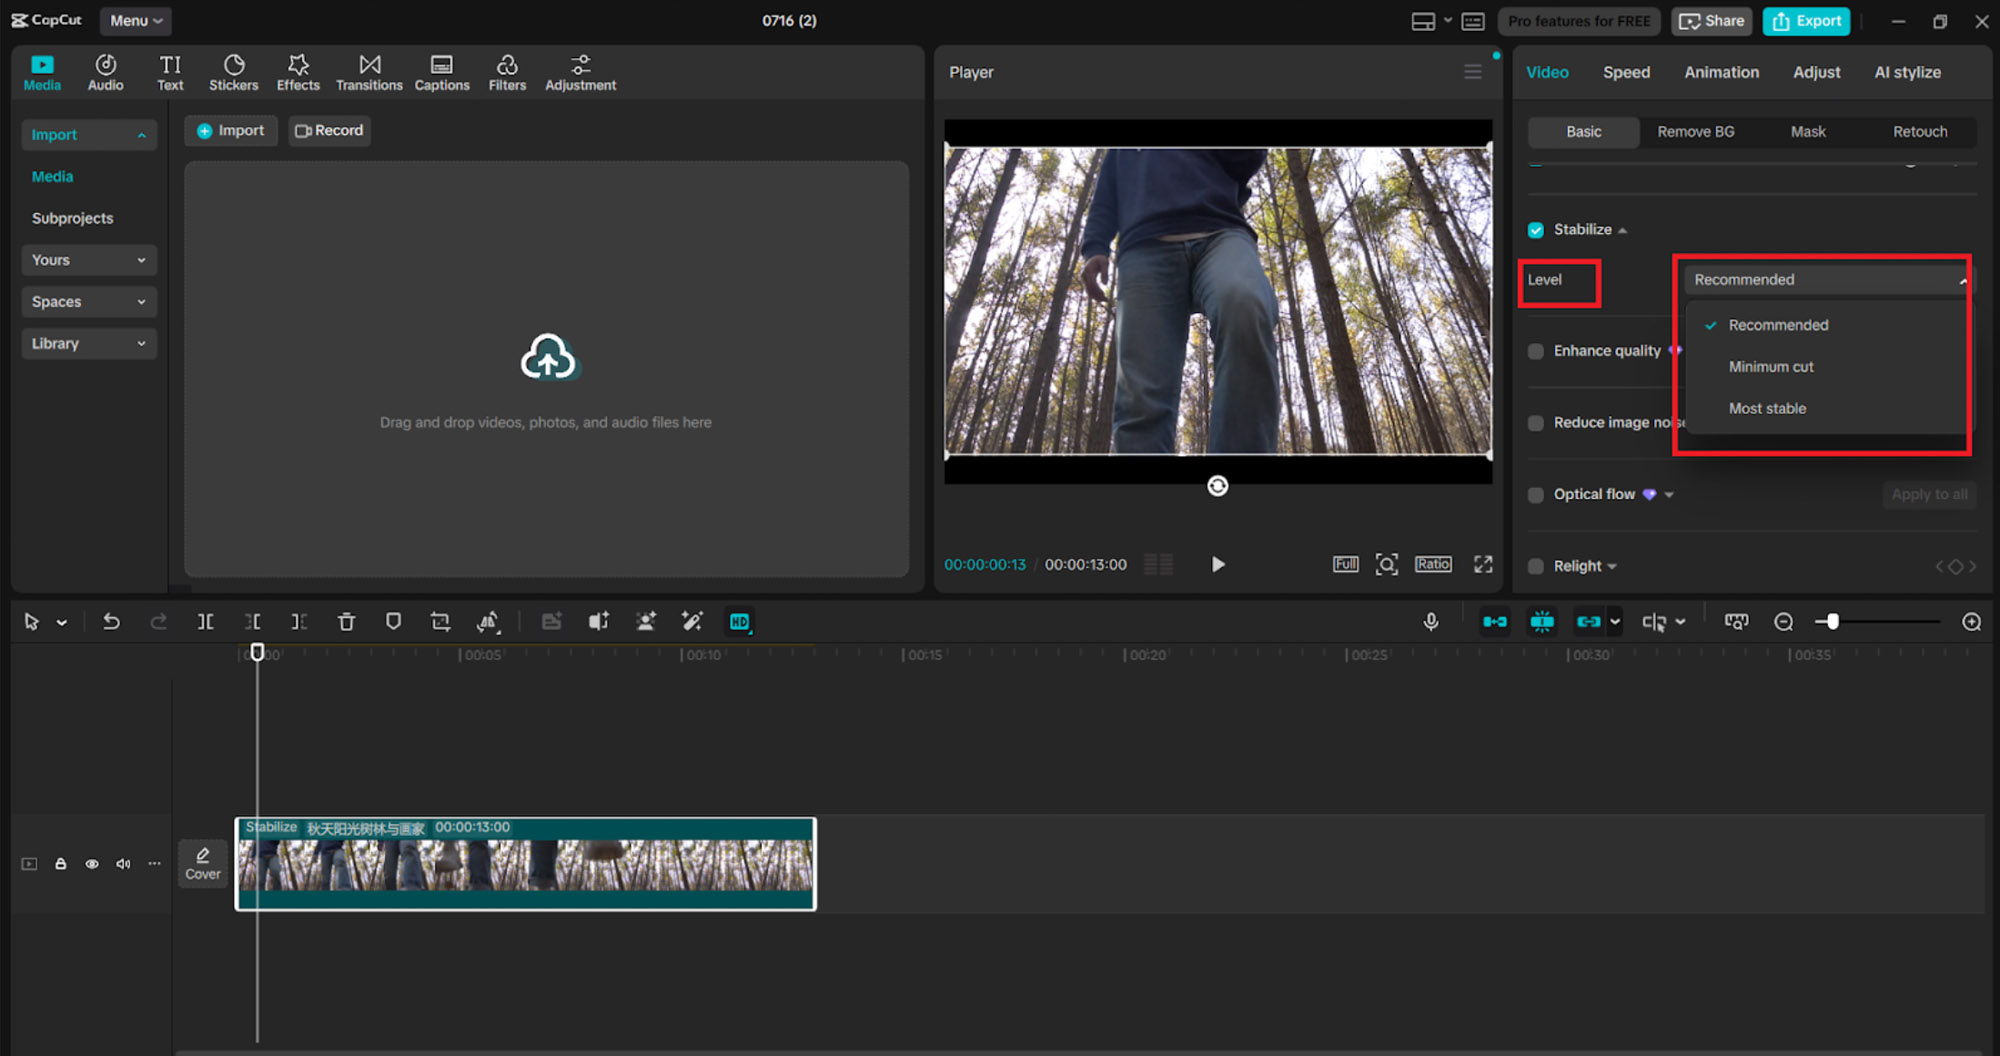
After analysis, you’ll see a Level dropdown under the Stabilize section. Choose one of the following:
- Recommended – A balanced default for general shake
- Minimum Cut – Preserves more of the original frame with lighter correction
- Most Stable – Applies maximum smoothing but may crop the edges
Preview each in real time and select the one that feels most natural. For slight camera shake, the Recommended setting often works best; for more intense motion, go with Most Stable.
Step 5: Export Your Final Video
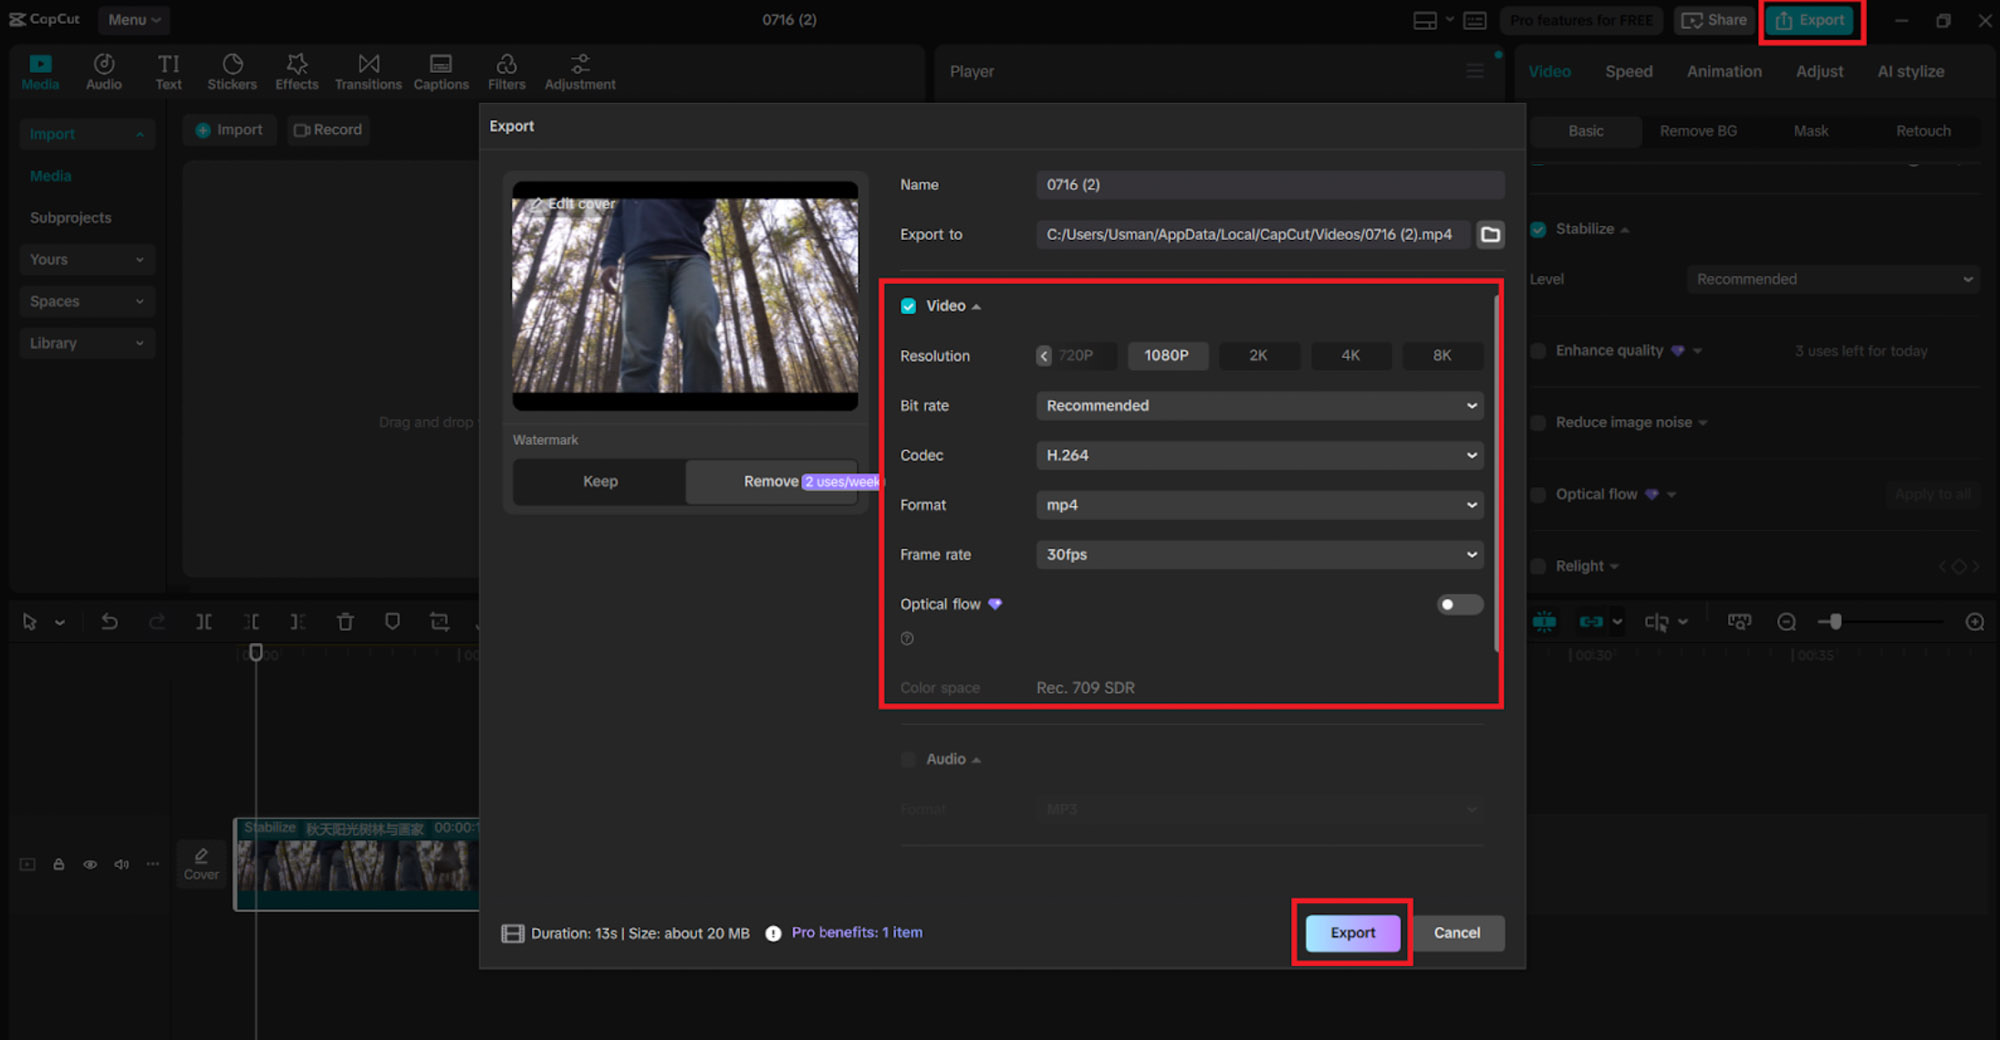
Once you're happy with the result, click Export in the upper-right corner. Set your file name, resolution, and format, then hit Export again to save the stabilized video to your computer. Your final product is now ready to post - whether you're uploading to YouTube, sharing on socials, or adding to your portfolio.
Why Creators Use CapCut for Video Stabilization
CapCut has become a favorite among editors for its ability to make complex edits feel effortless. Here's why it stands out when it comes to stabilization:
- AI-driven automation that requires zero guesswork
- Clean, professional-quality exports up to 4K
- Simple interface with high-level tools behind the scenes
- Fast processing times, even for large projects
CapCut makes it easy to create smooth, polished visuals without the hassle of complicated software or time-consuming edits. For everything from working on quick cuts to long-form projects, its built-in stabilization fixes shaky footage fast - and with powerful AI features like text to speech AI voiceover, upscaling, and noise removal, you can elevate your entire edit in one seamless workflow.