Subscribe to our Newsletter to Receive a Free Lightroom Preset!
After releasing our Preset Shop last year, the responses we've been receiving from happy customers have been amazing and heartwarming. I first started to learn Photoshop in High School way back in 2002 - and have been editing digital imagery ever since. While it may seem like after all these years, I would know everything there is to know by now, but I still feel like I am constantly learning and my style is ever changing - not the mention the technology has grown so much over the years! While I have always saved my working edits, creating settings that work with a wide variety of images has been a fun challenge, and has improved my own work in the process.
If you're not familiar with presets - they are a set of color and image settings that you can drop on to any image to create a consistent look. They are a huge timesaver (you can edit an entire image in just a few clicks), and a way to start learning about color processing and how to make fine adjustments to each image to make them really pop. My presets work for both Photoshop and Lightroom, as well as in Lightroom Mobile directly on an iPhone.
And now we wanted to create a brand new Preset and give it away for FREE, as a way to say thank you to everyone that has supported us this far! My new Travel Dreams Preset is designed to work with a wide variety of images - from tropical beaches to cityscapes and create a cool, modern with a vintage twist look to all of your travel images.
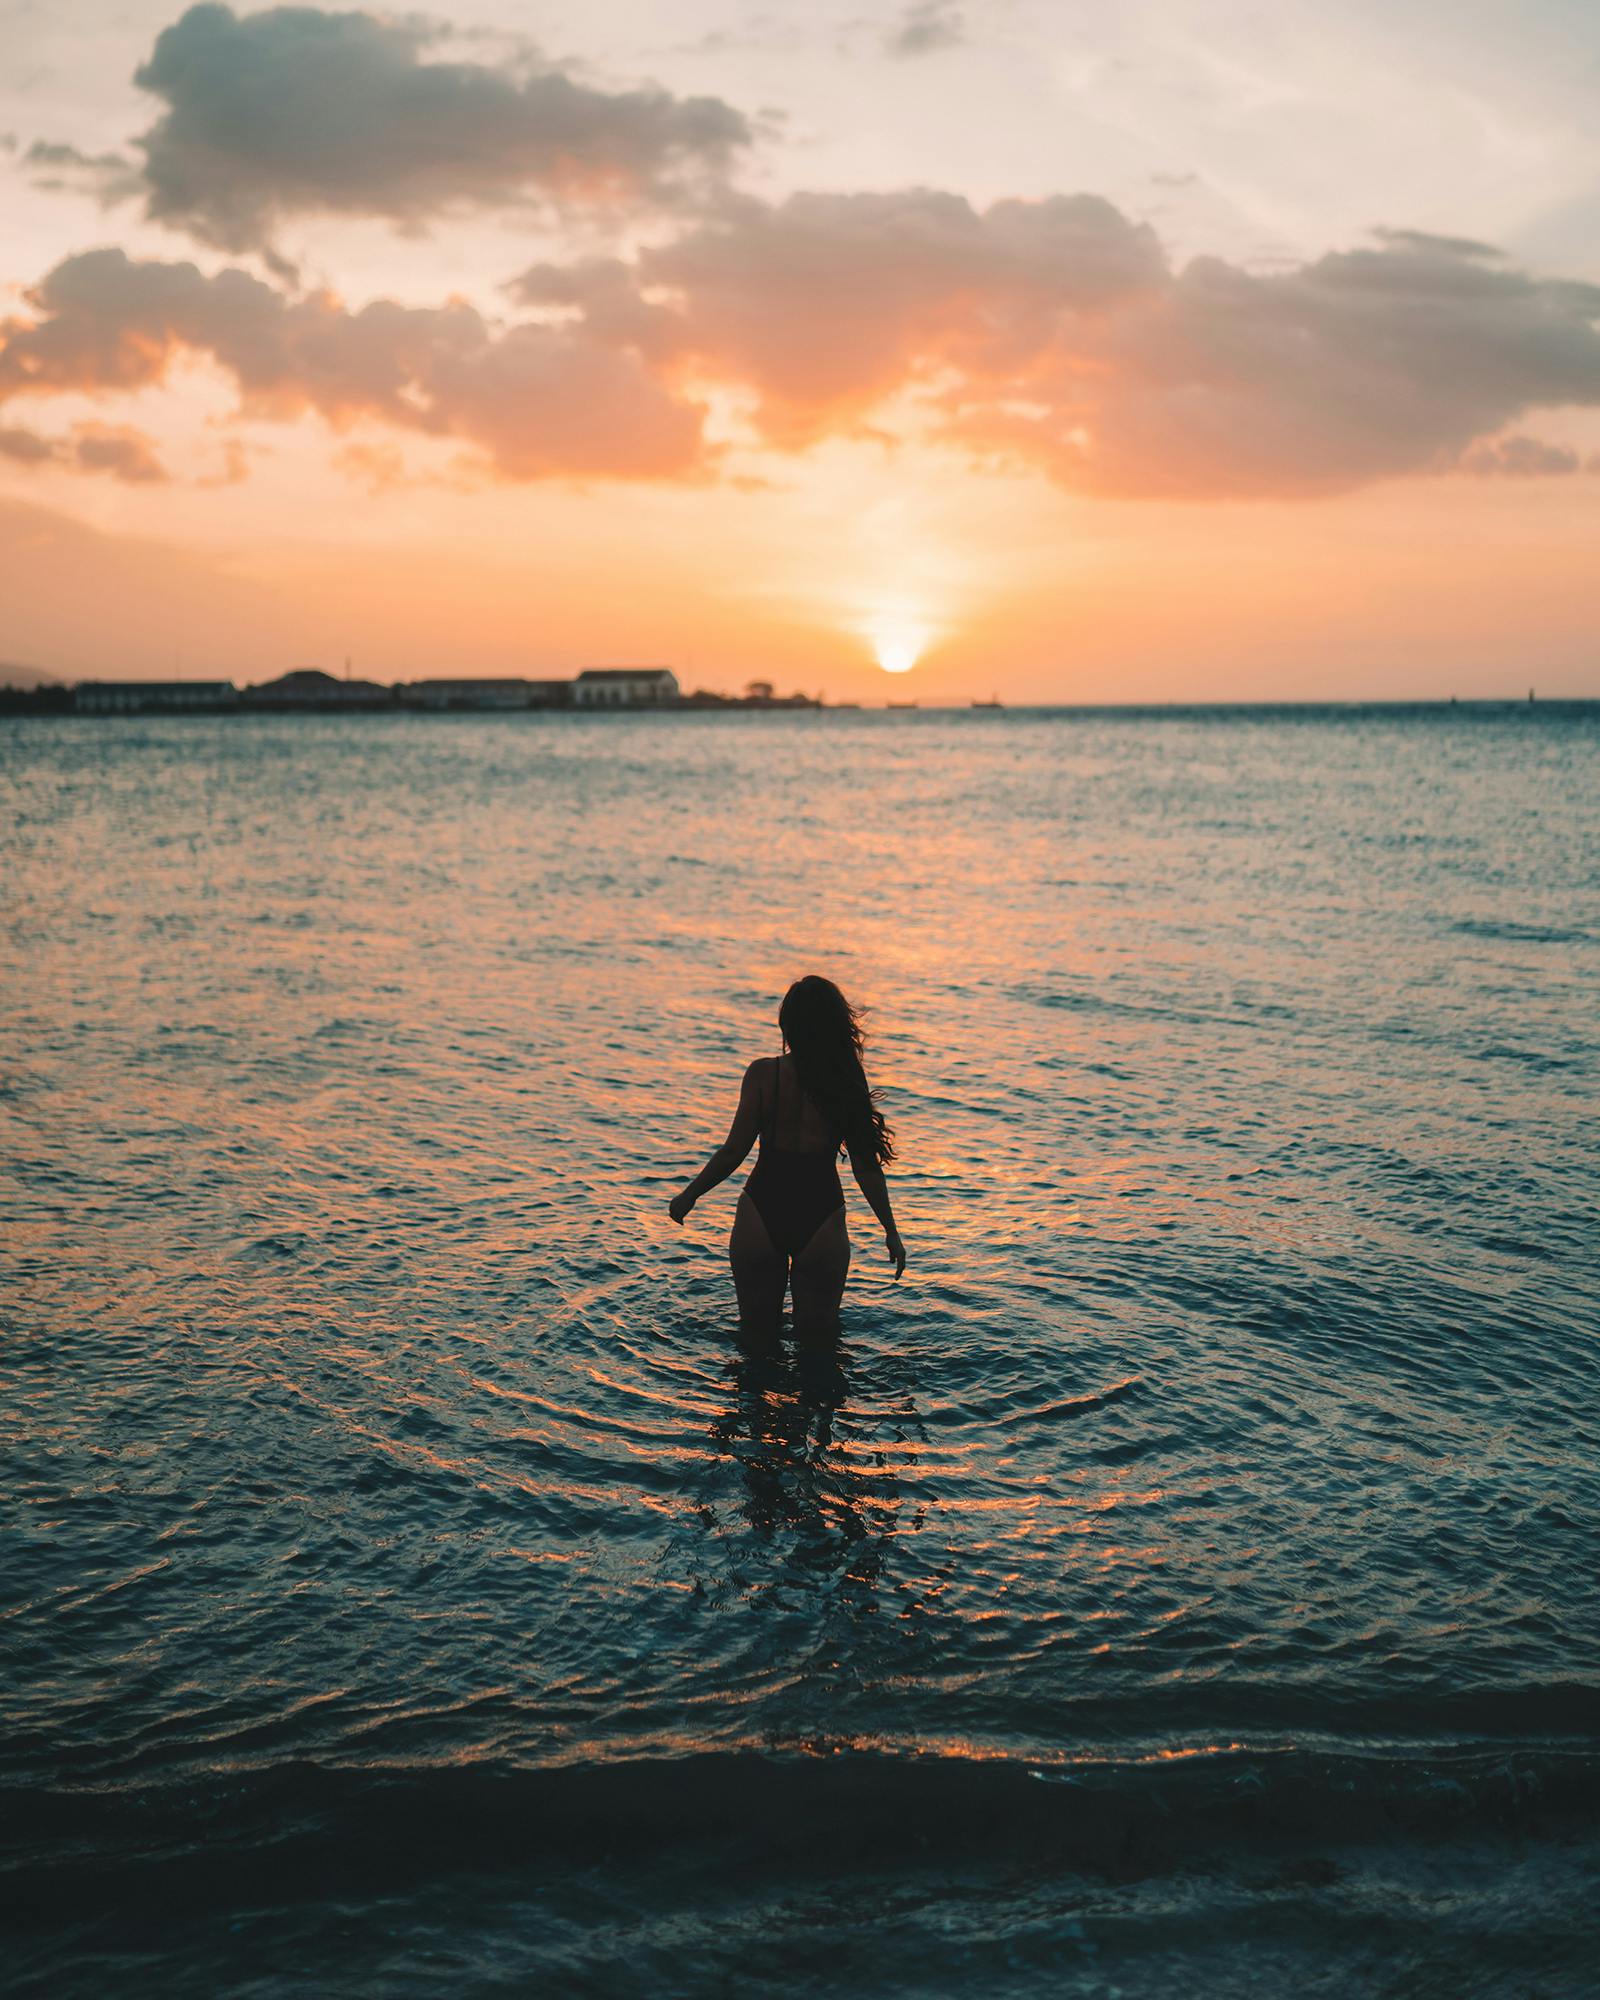
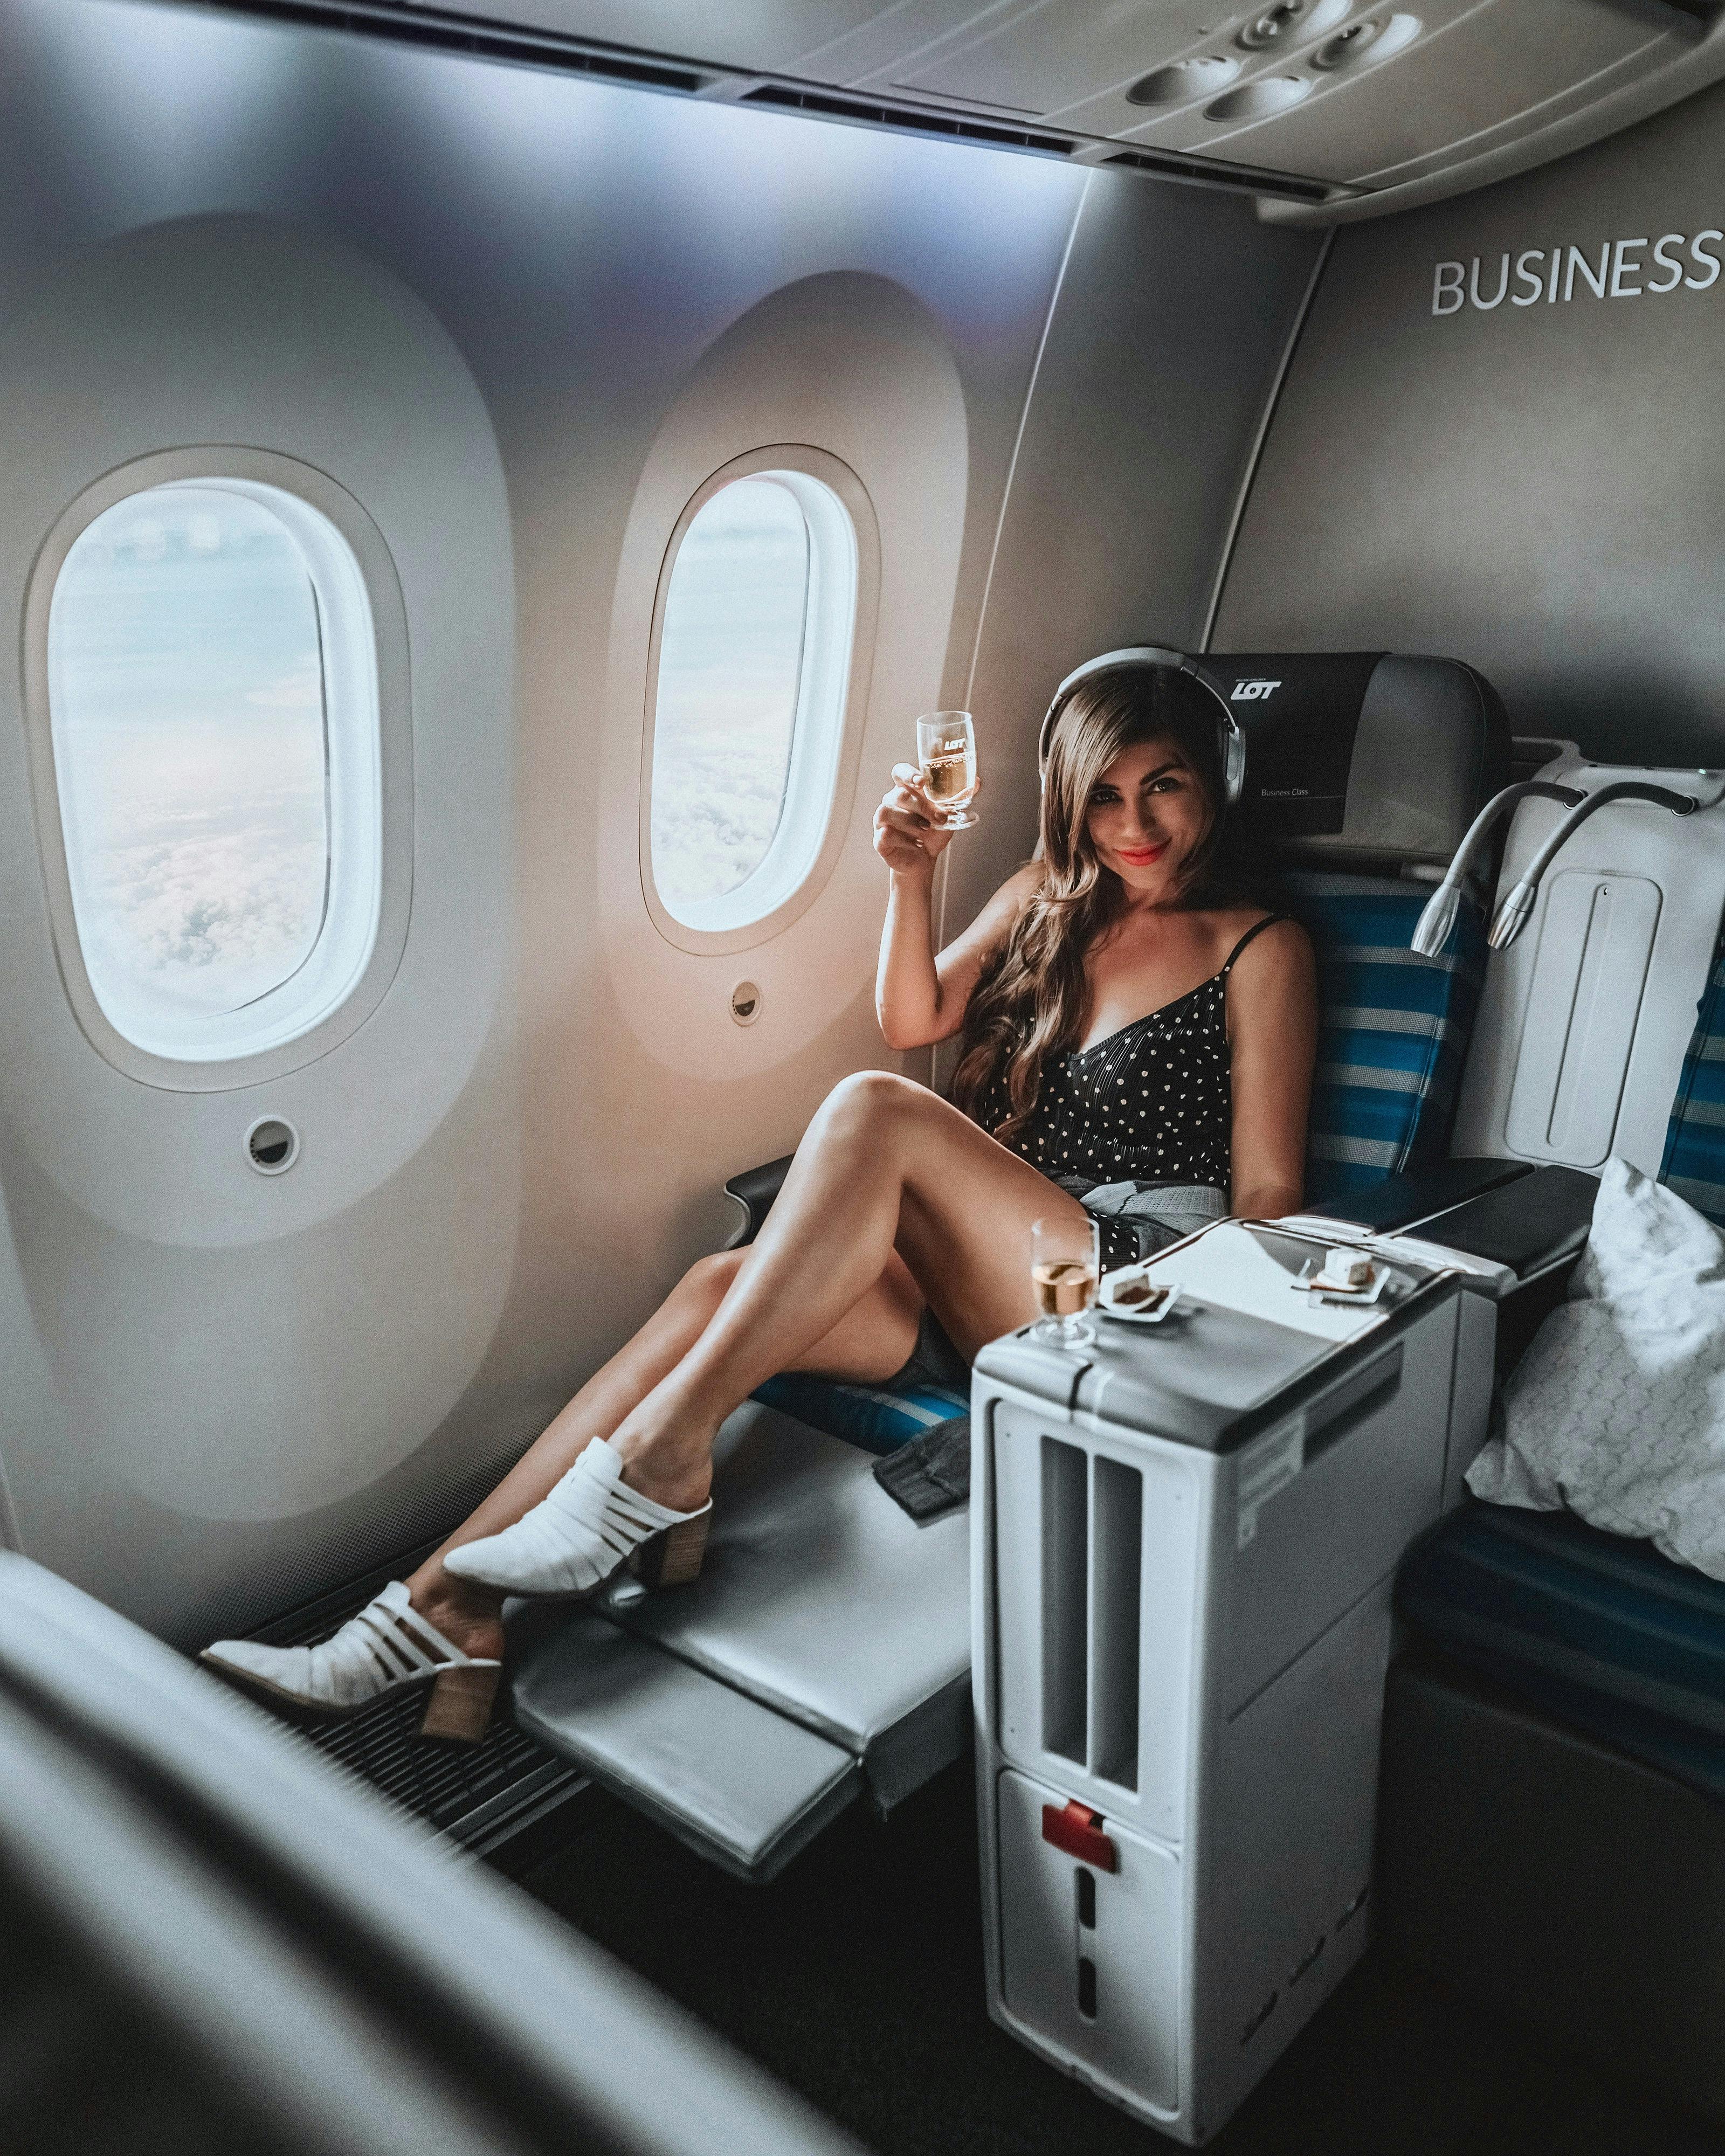
Check it out below! All of the images here are one-click edits: just the preset is added and no further changes have been done!
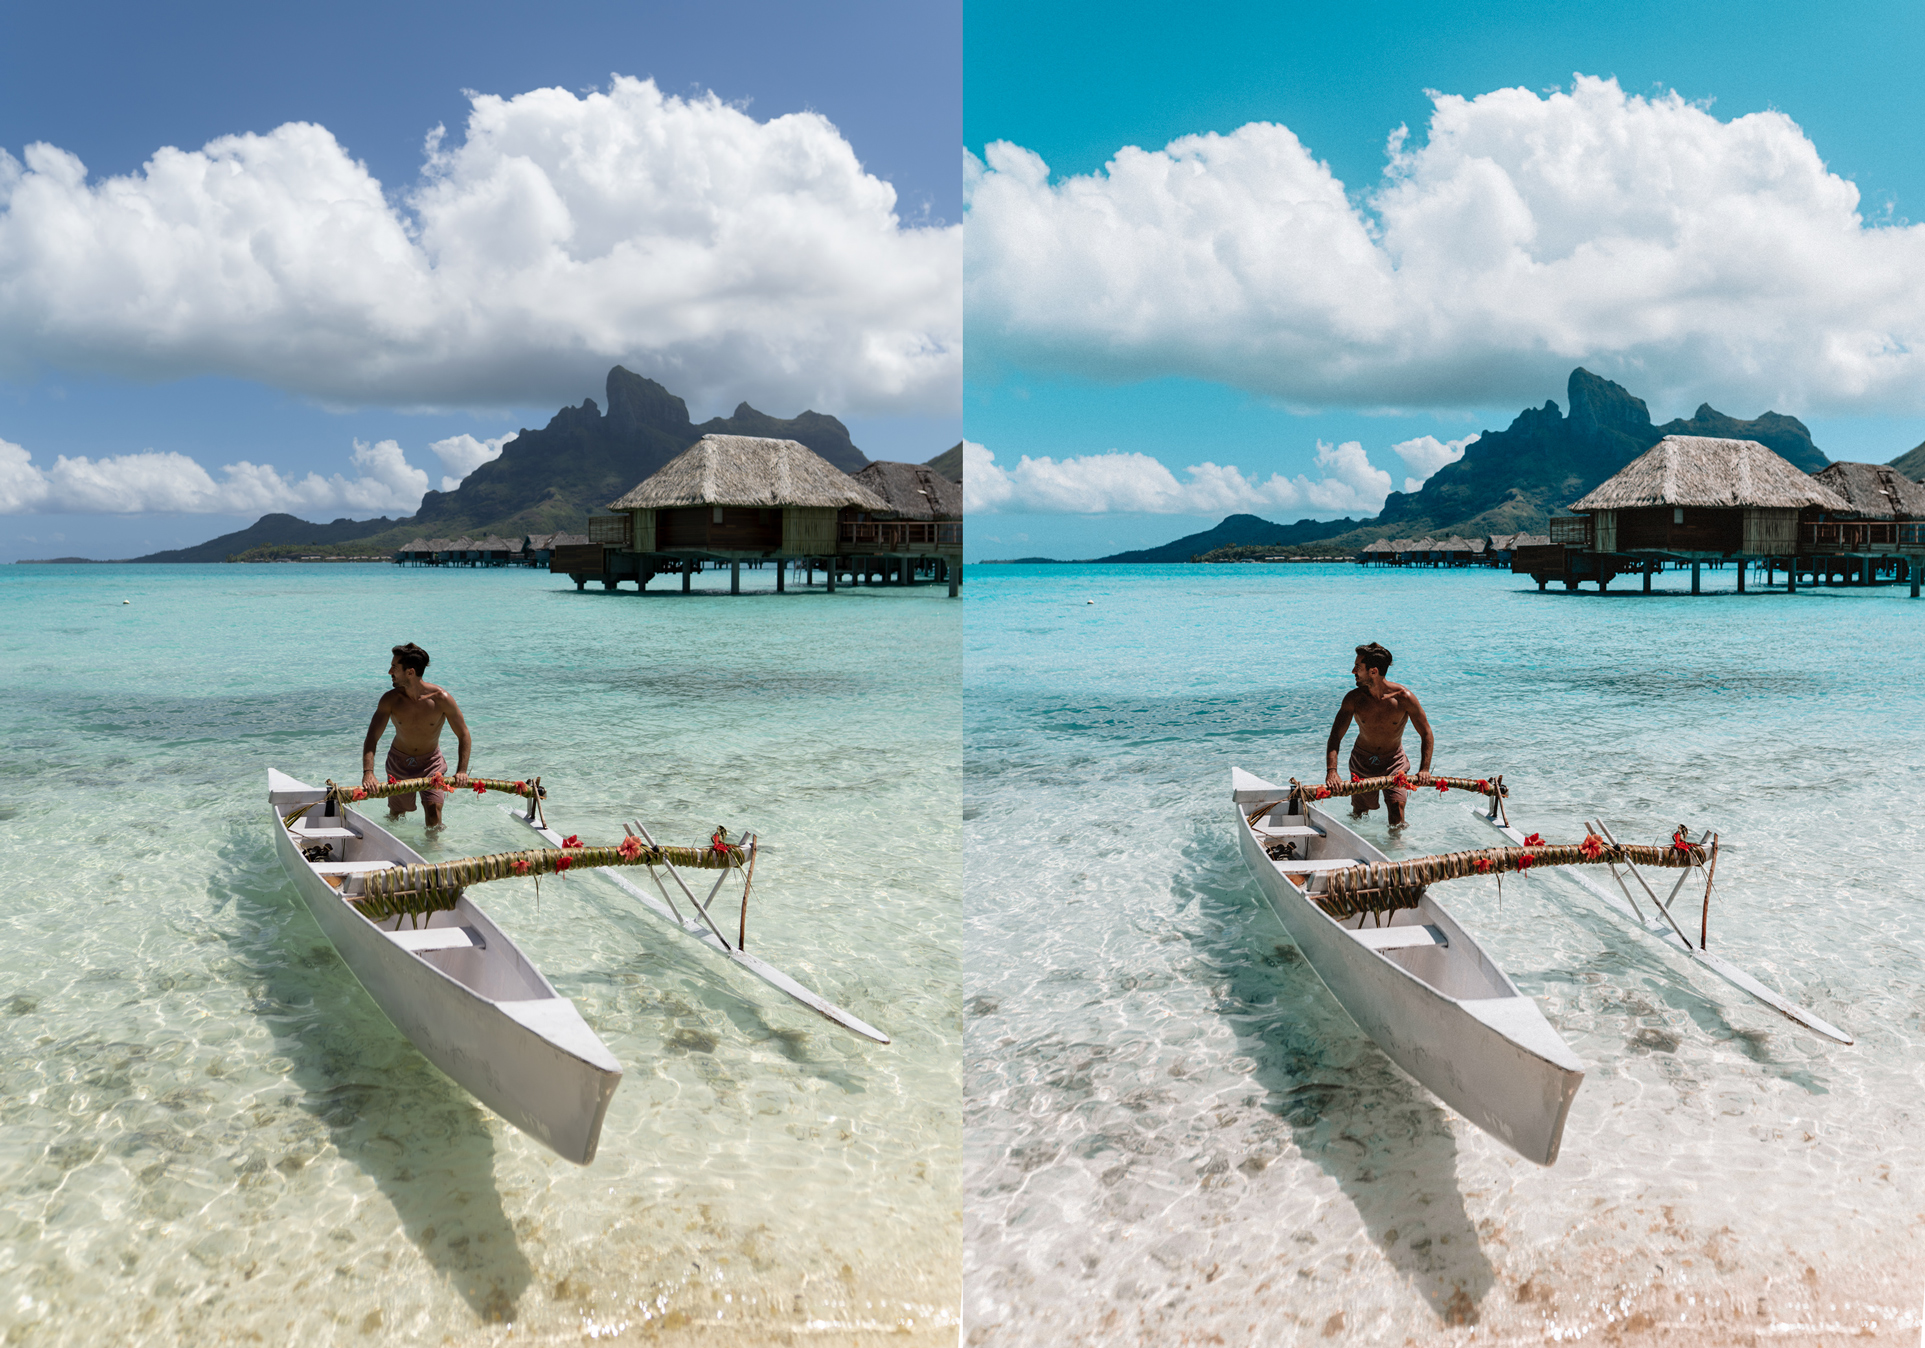

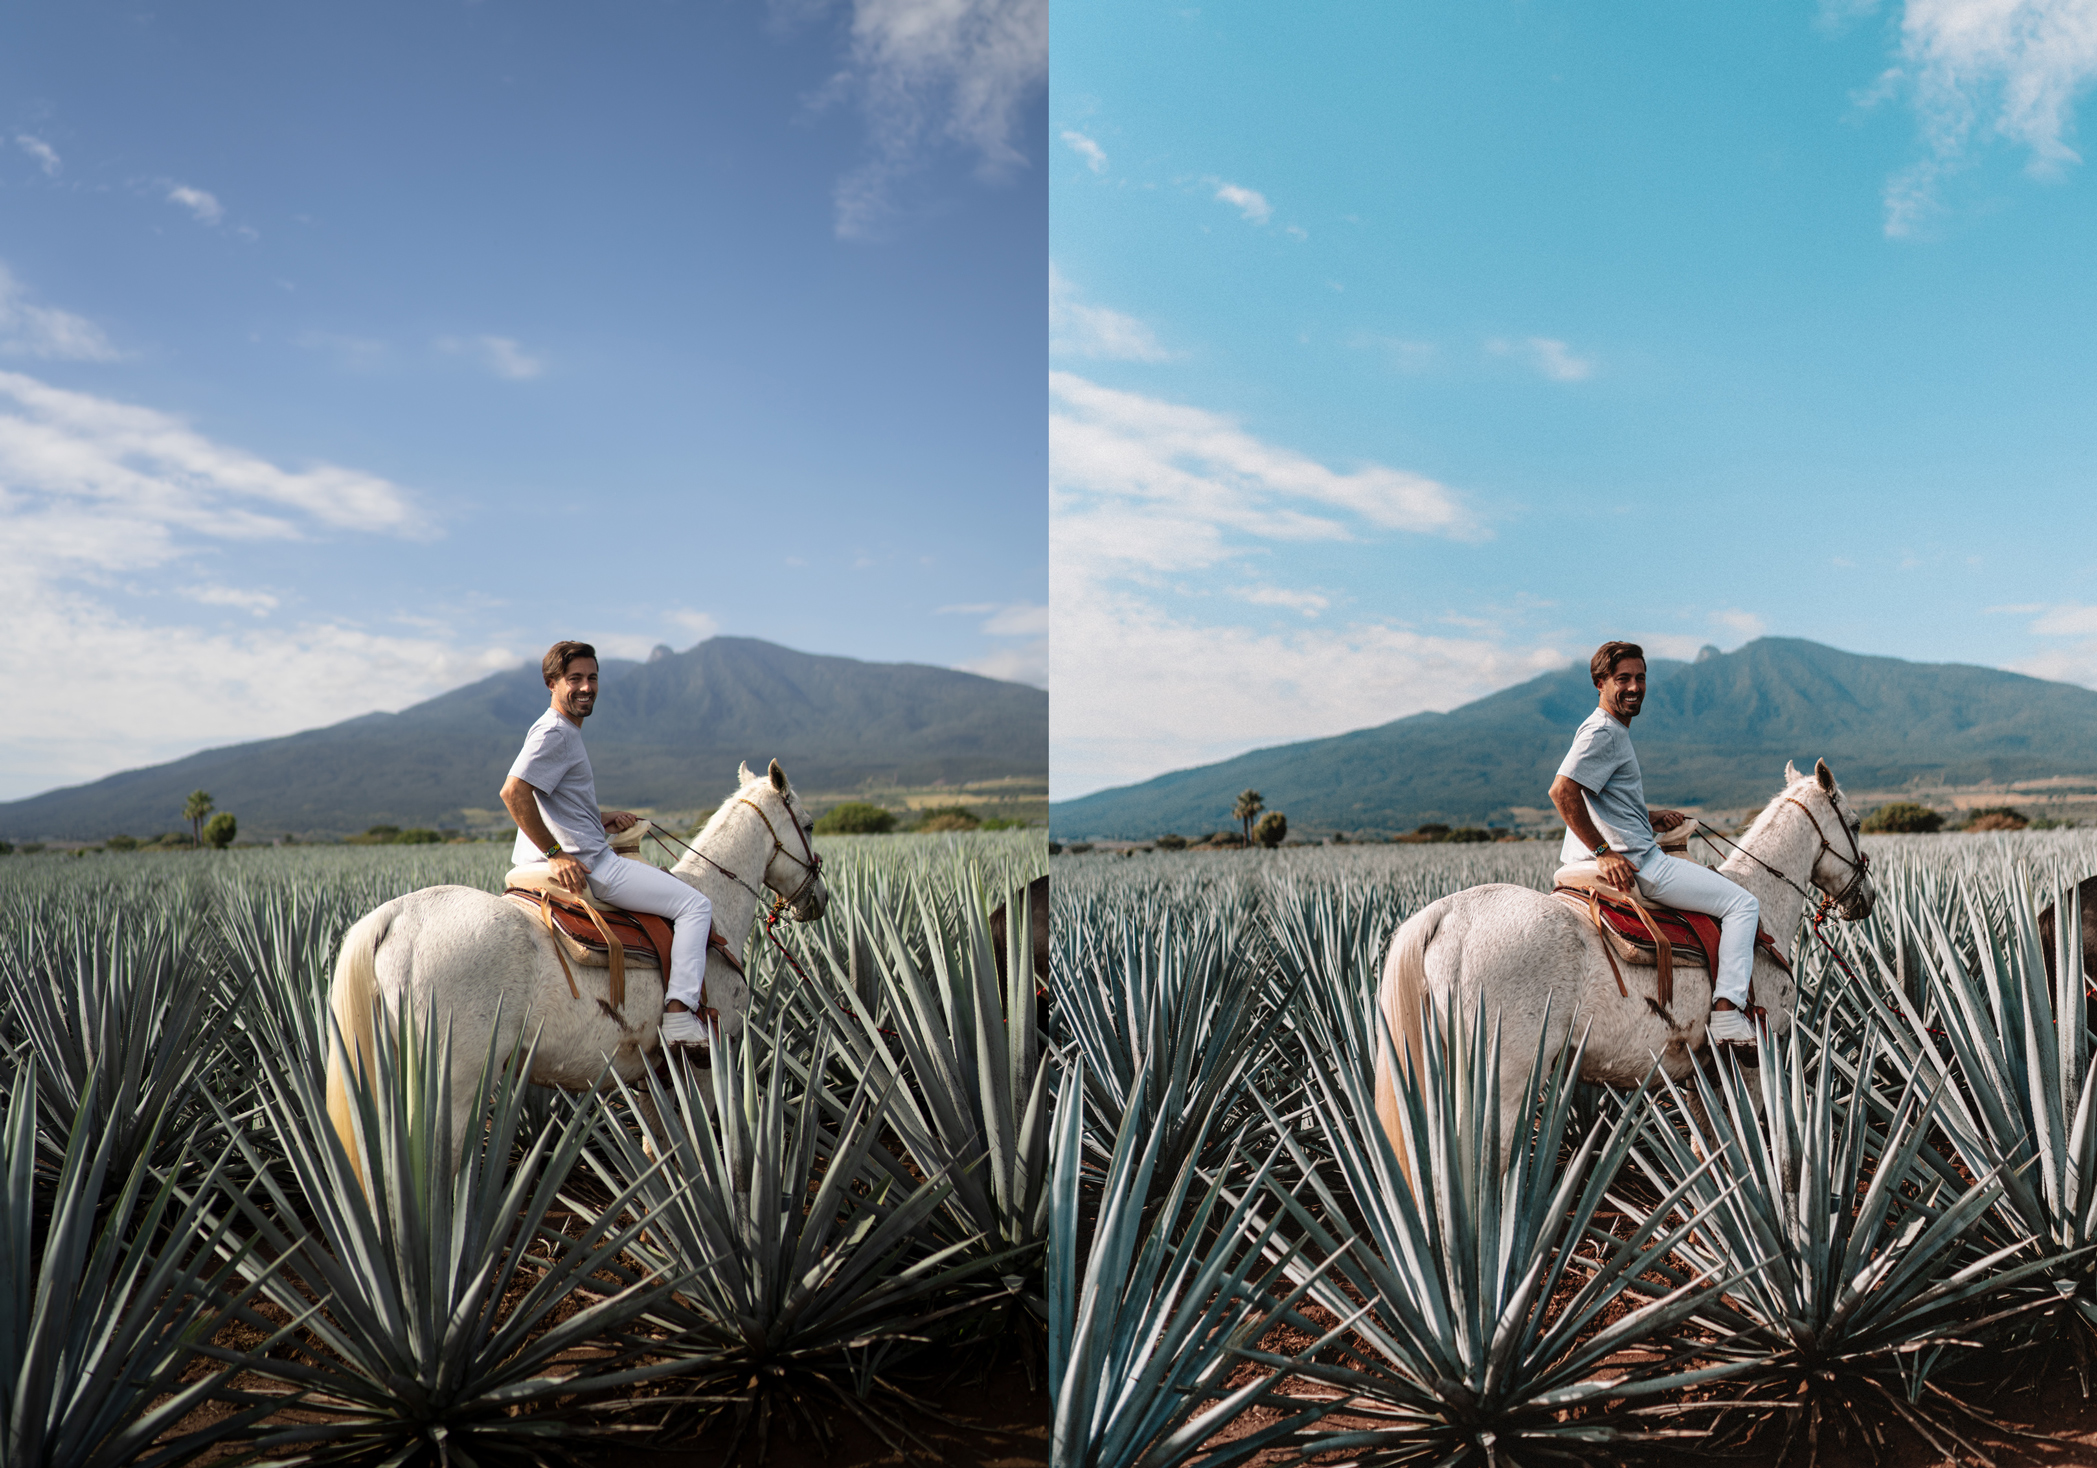
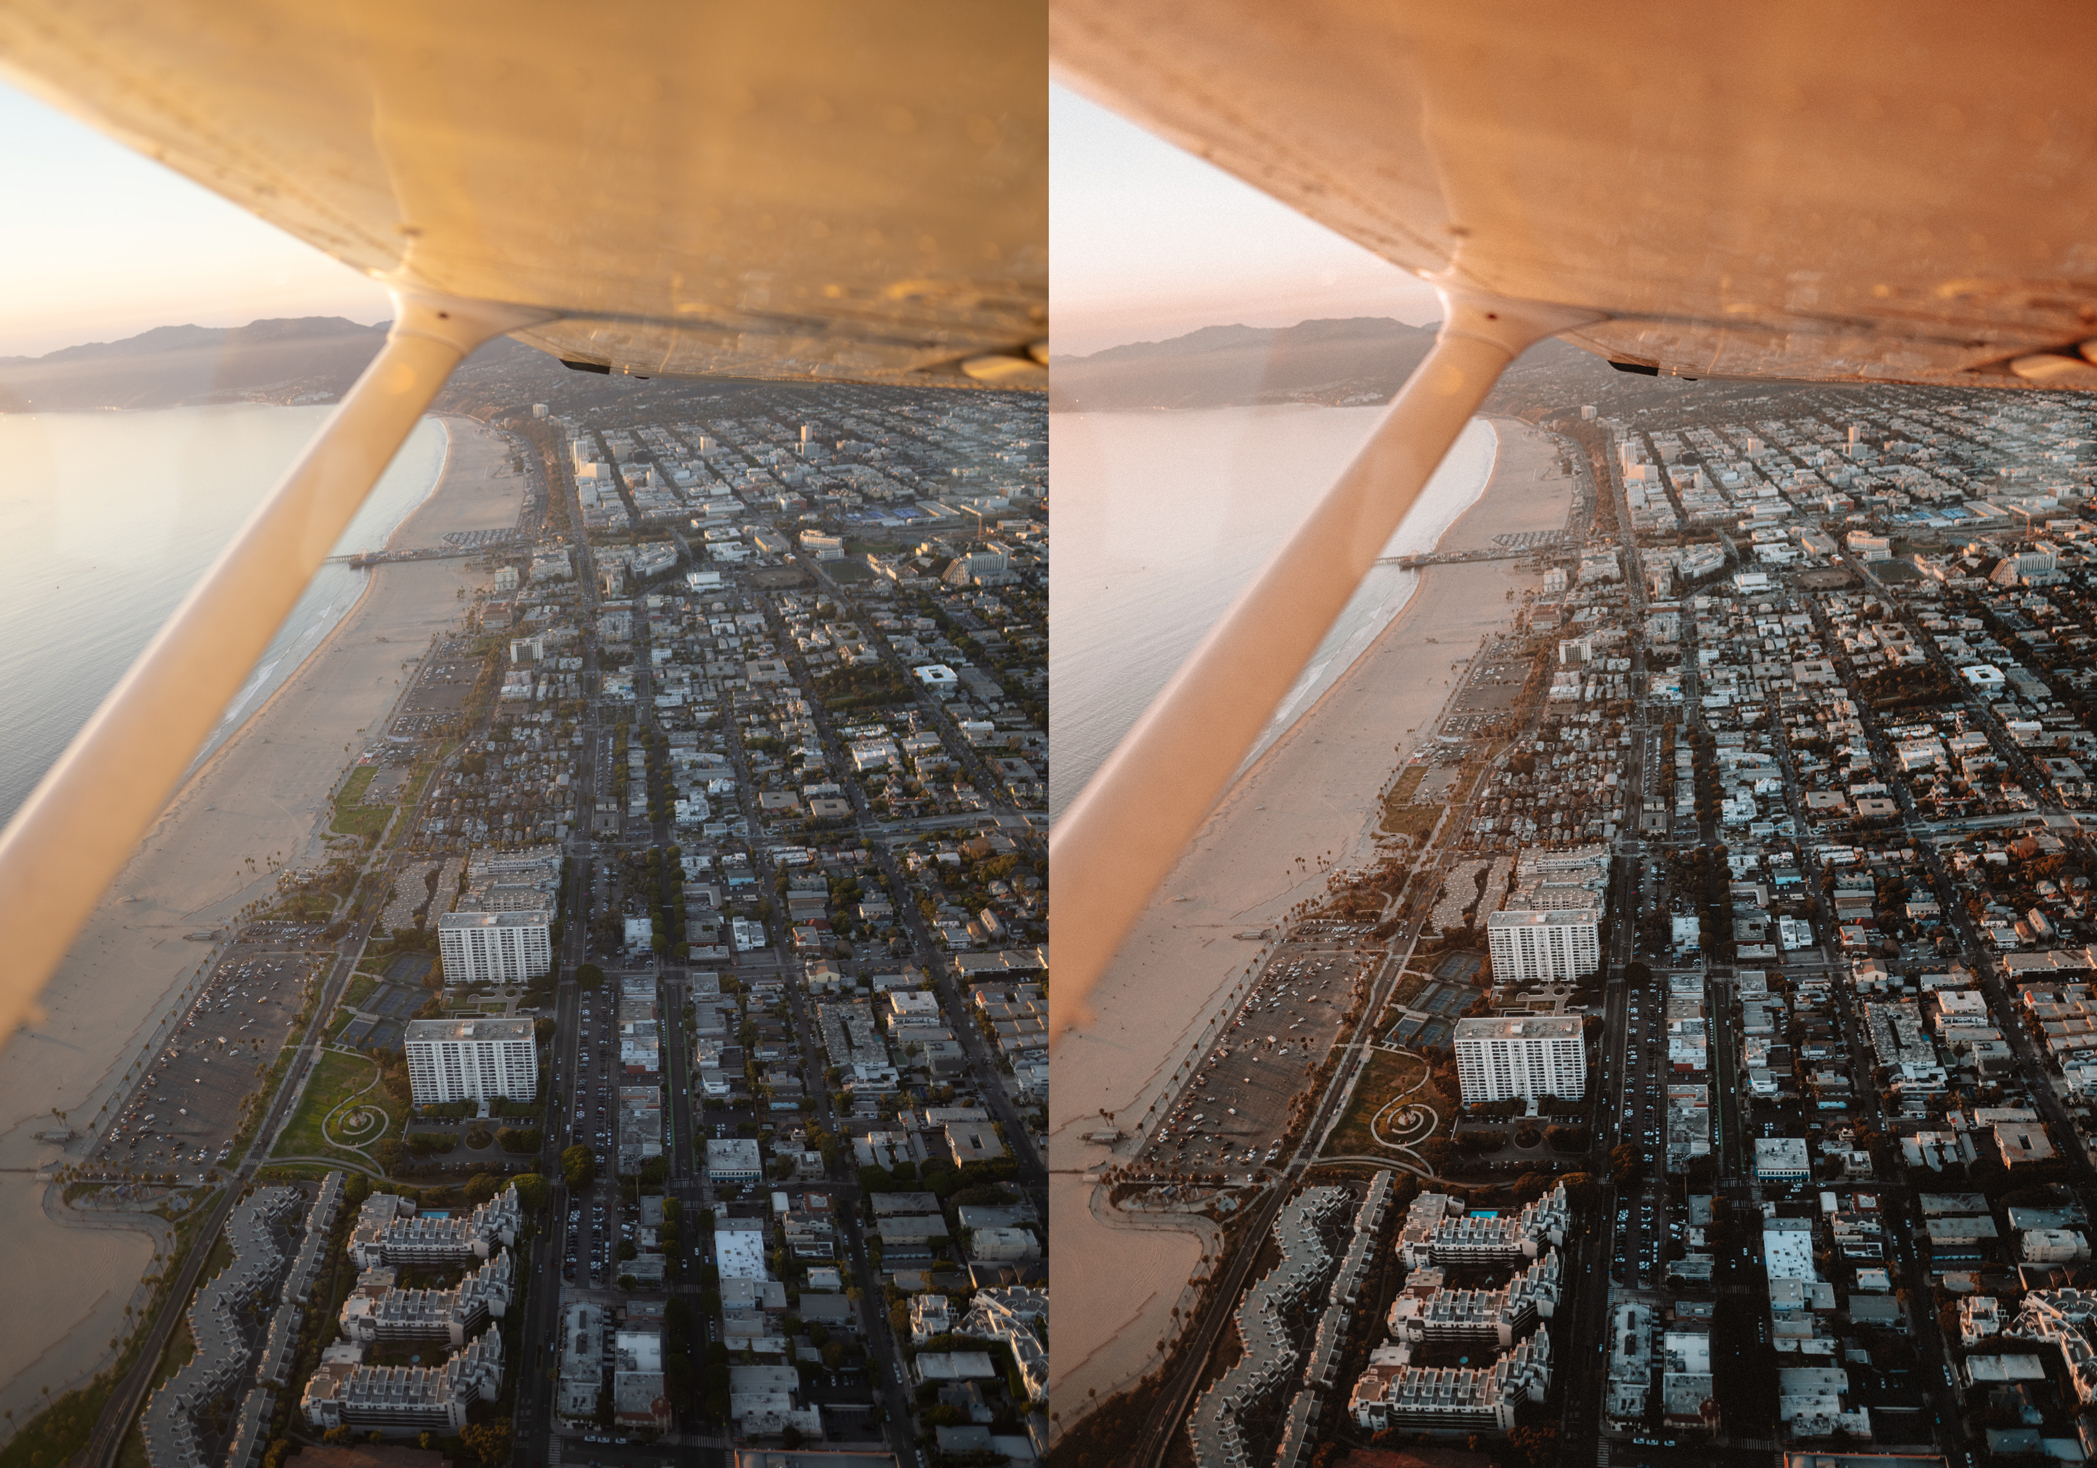
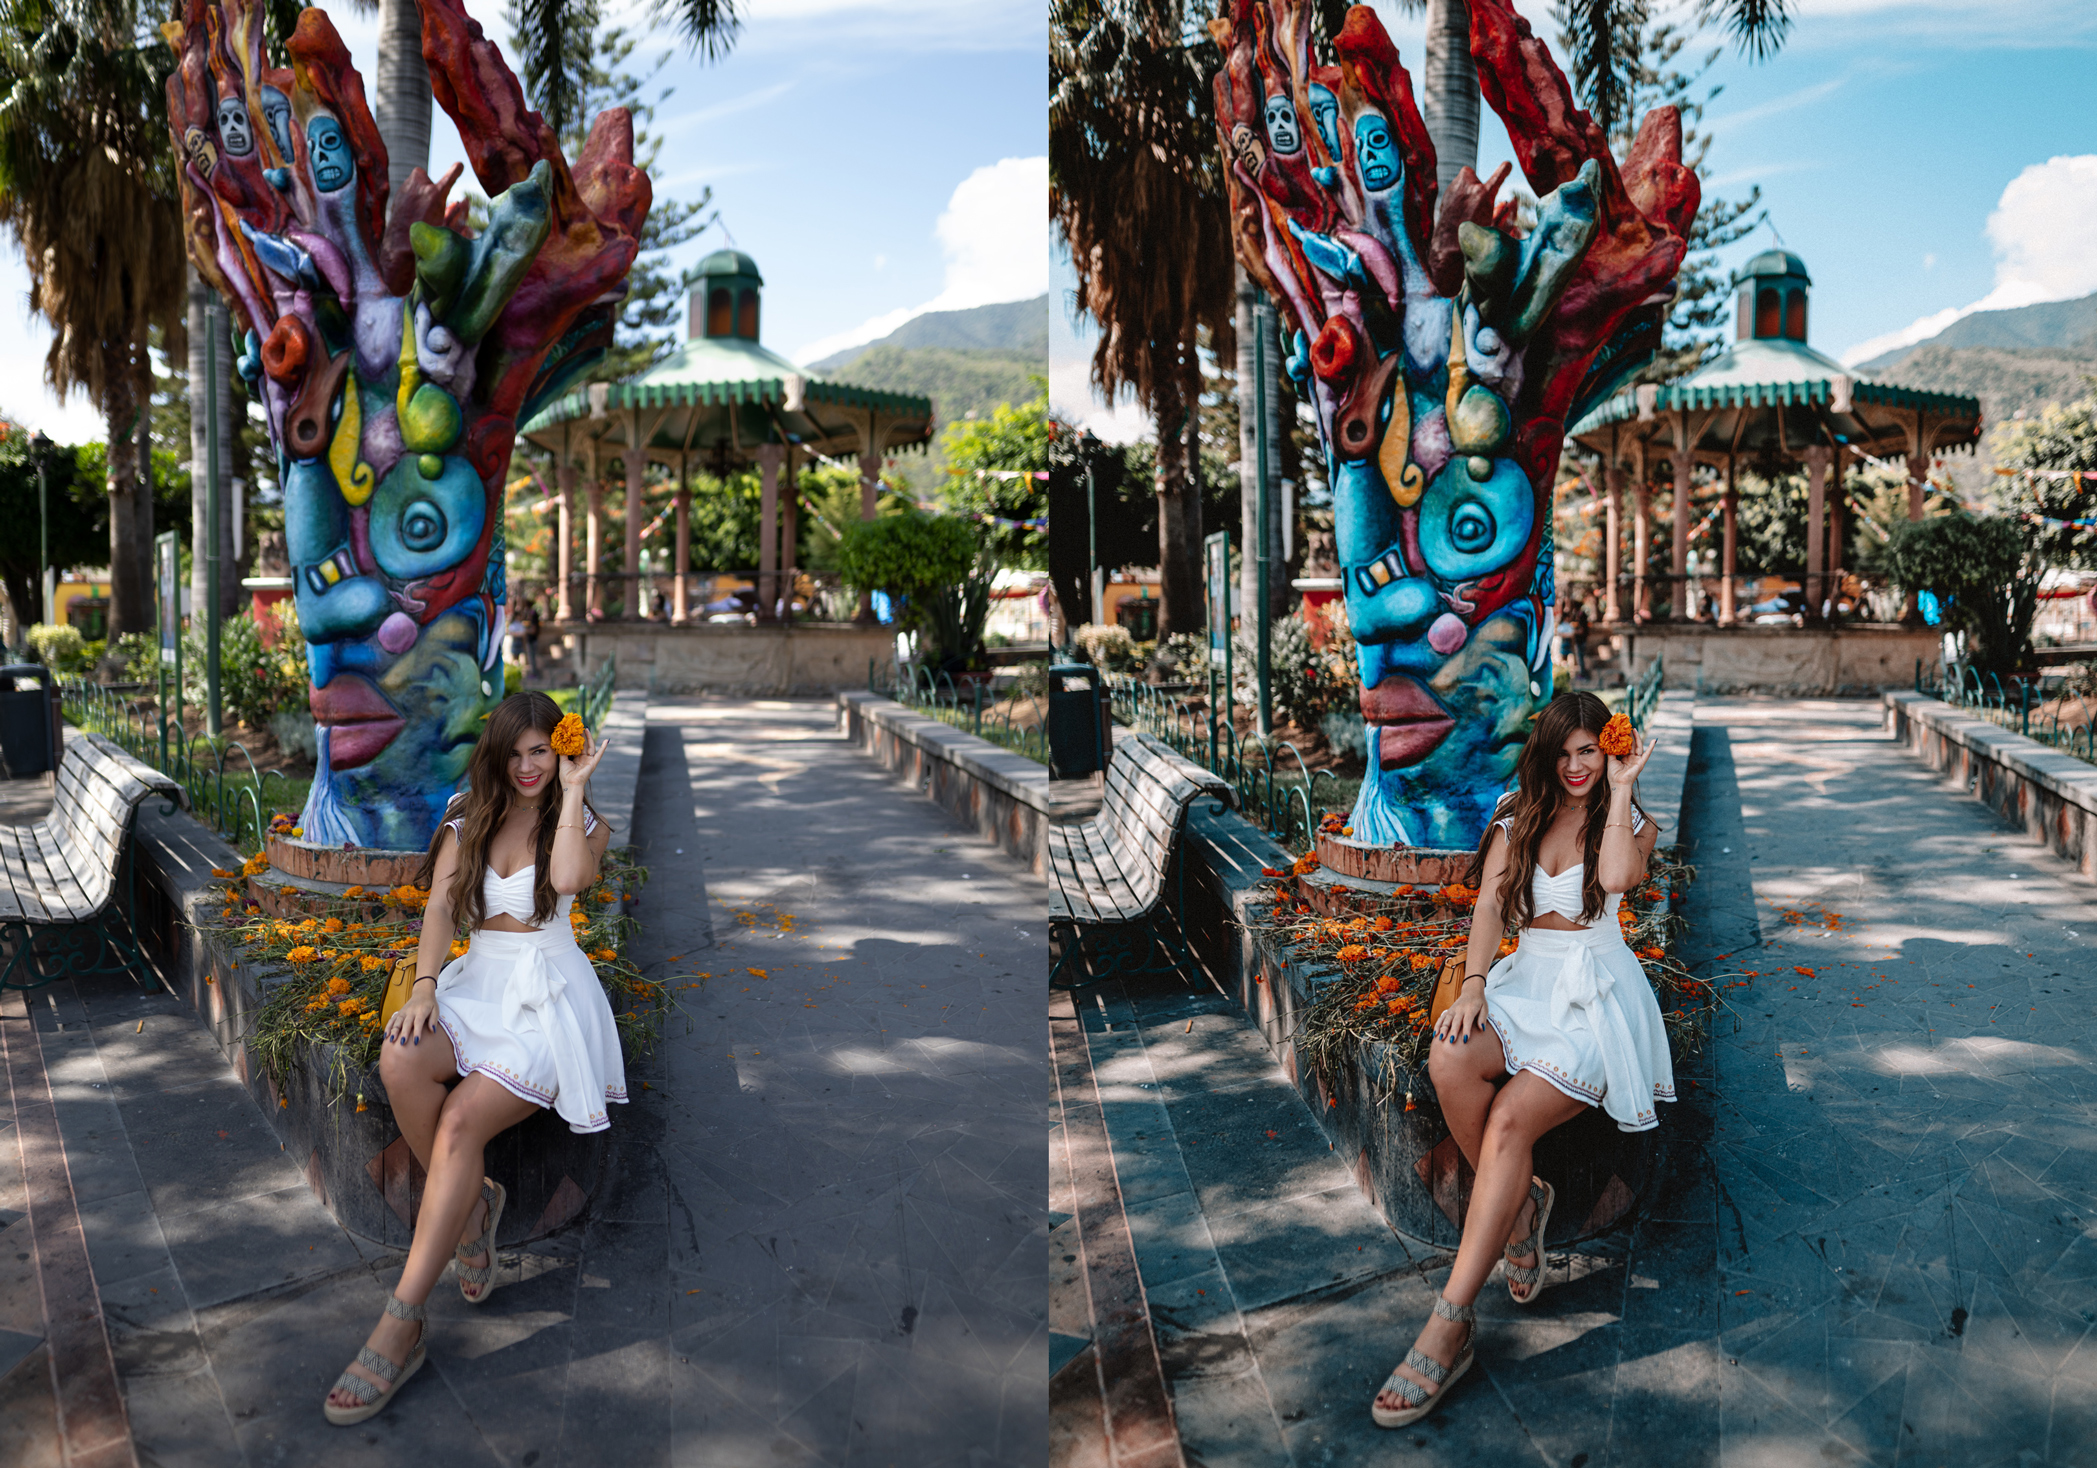
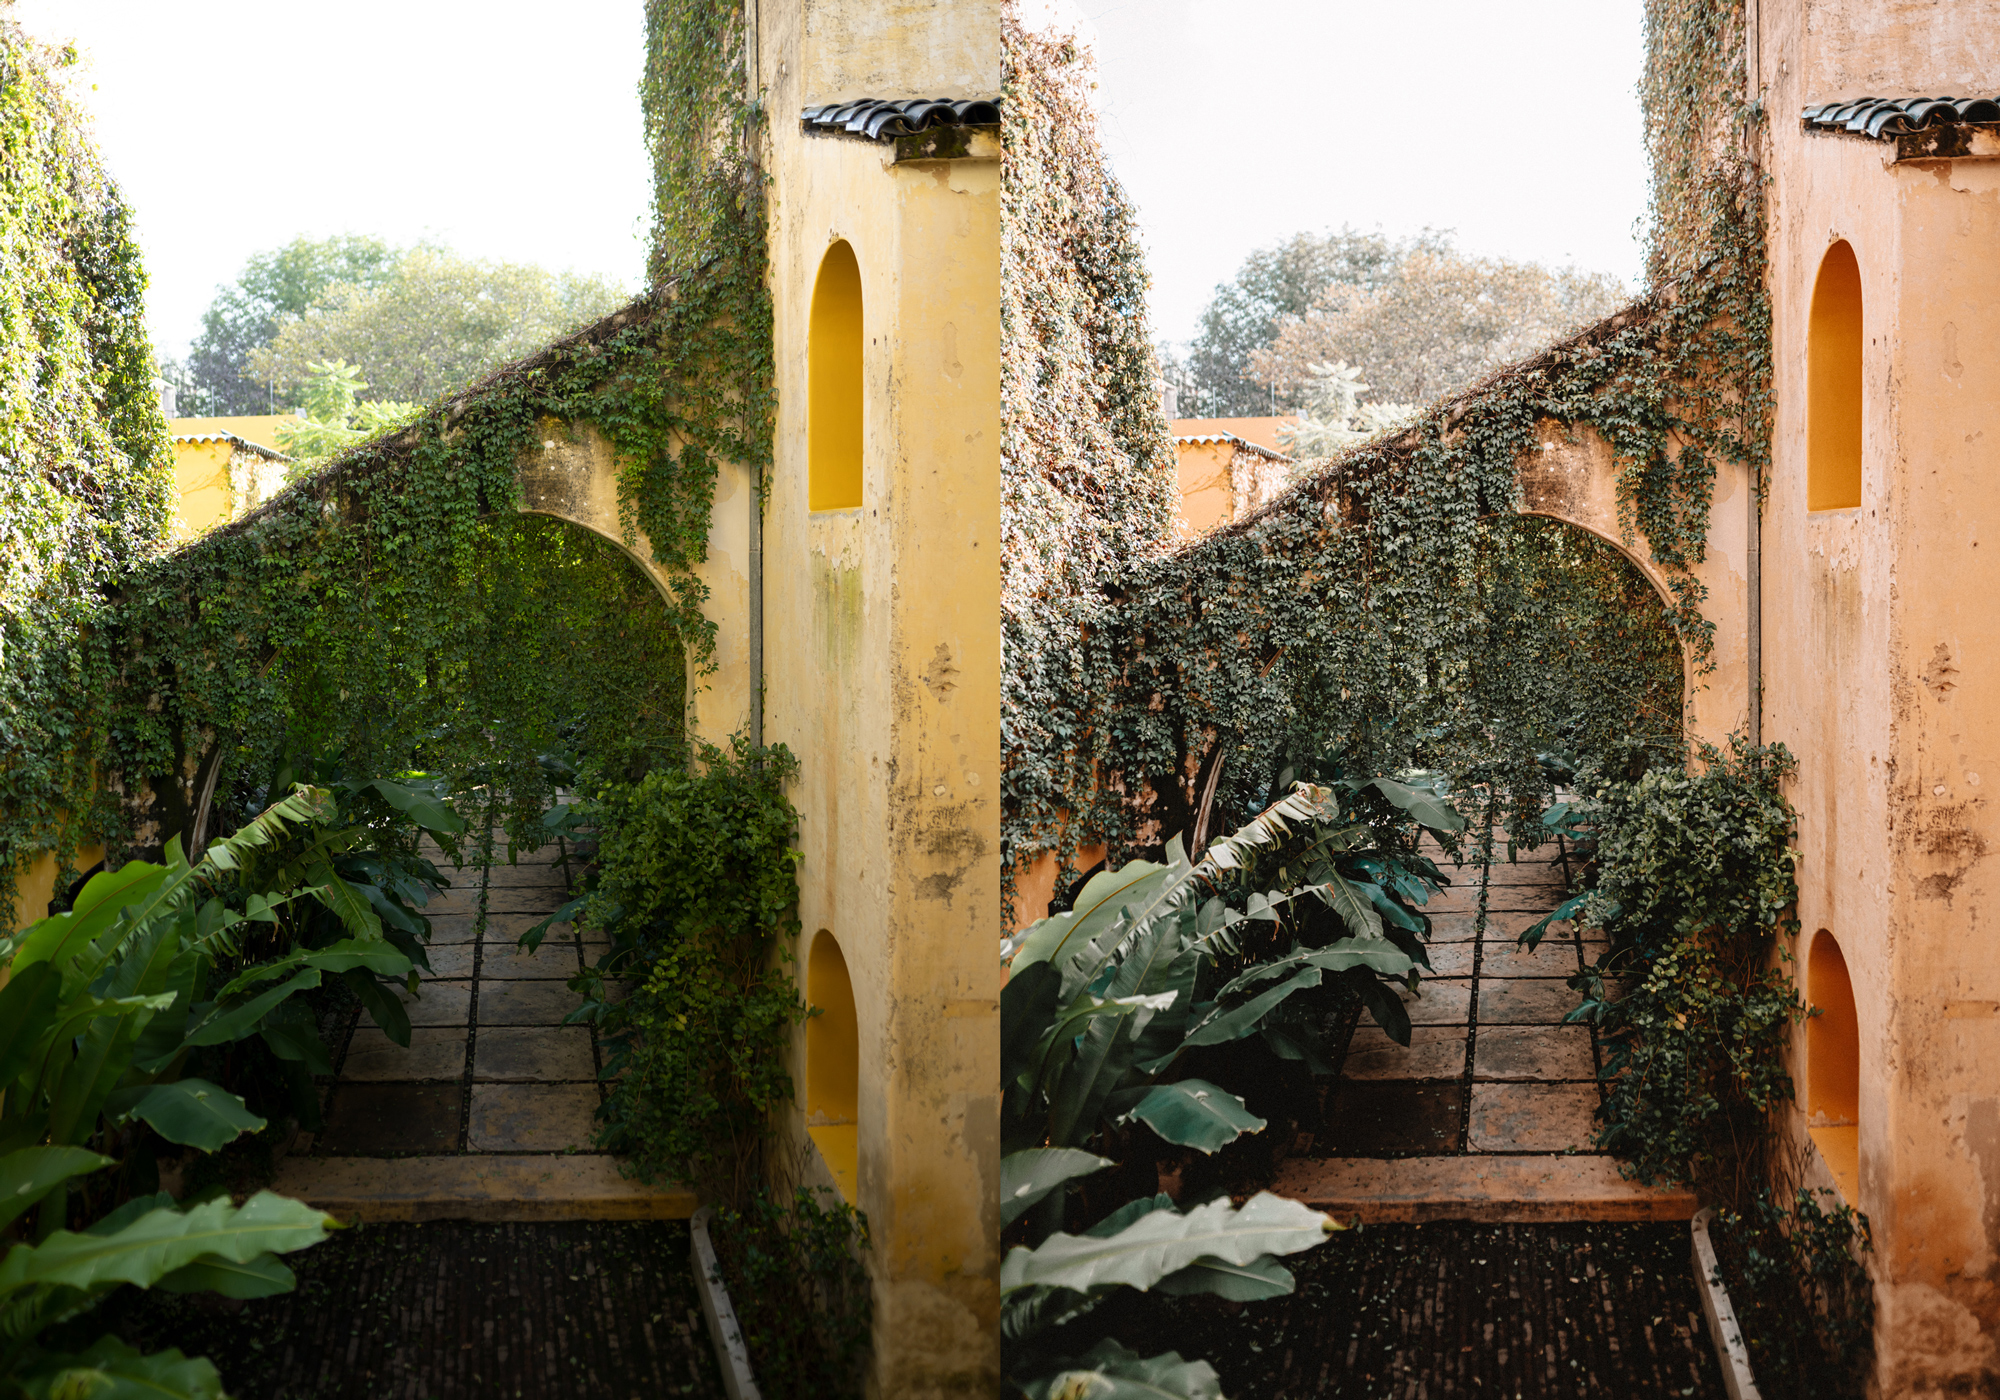
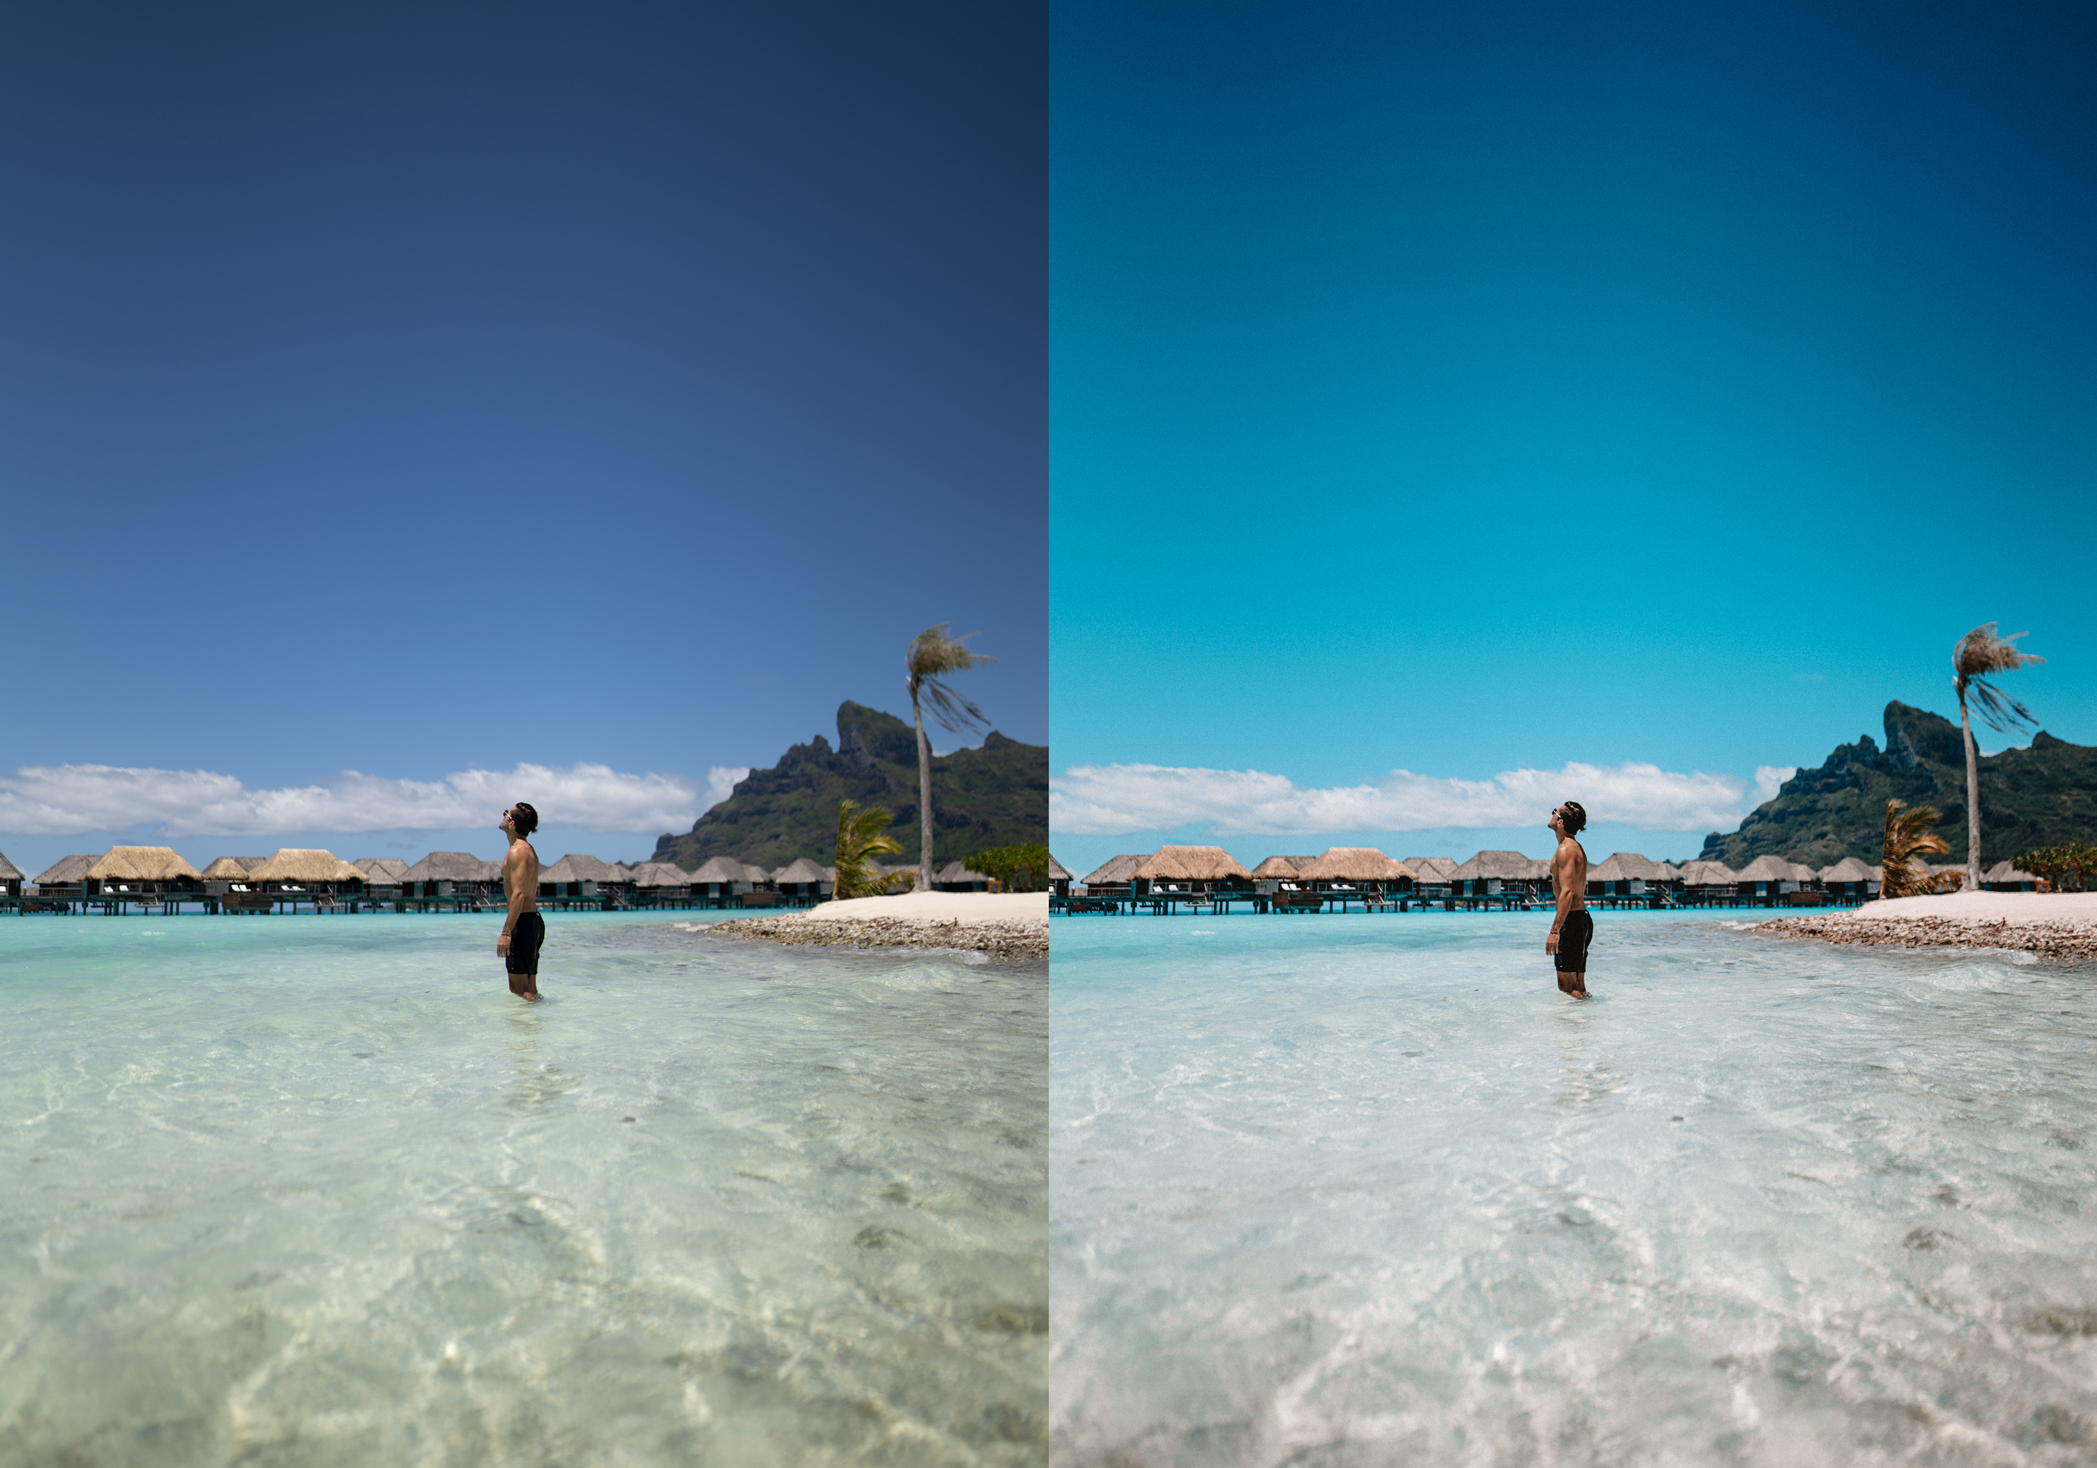
However, every image is different and settings will affect each image a bit differently. My most common adjustments after applying a preset are these 5 quick steps:
- Exposure - pull this slider down to make the image darker overall and up to make it brighter. Depending on your lighting and capture, just this simple adjustment can make a preset be exactly where you need it to go.
- Color Temperature - Different lighting has vastly different temperatures, and this slider makes an image more blue (cooler) or more orange (warmer) to compensate. Bright sun daylight is considered the neutral point here at 5500 Kelvin - while images shot in clouds or share need to me made warmer, and images shot in indoor lighting need to be made cooler to create the same neutral effect.
- Orange Color - This is where skintones lie. Pulling down the luminosity on the oranges will make your skin look more golden tan (most of my presets are designed to give skintones a tan glow), but you need to balance this with the orange saturation - so you look golden but not full Oompa Loompa. As everyone has different skintones, this is an important one to adjust to make your unique skin look it's best.
- Grain - Depending on how large of images you are starting with, the same grain settings can look either very intense or very subtle. The camera I usually shoot with has 60 Megapixels ( = GIANT filesizes), but if I'm using the same preset on an iphone image, the grain can look much stronger, and needs to have the amount reduced under the 'effects' slider in Lightroom.
- Shadows - Depending on how strong your lighting is, pulling up shadows can greatly increase how much detail you can see in an image. If the light or sun in your photo is behind the subject, they will be backlit and have stronger shadows on the front, the shadows slider makes a HUGE different in the final image, and is a very easy one to set to exactly where you need it to go.
How to Get Your Free Preset
Now for what you came for! To download the Travel Dreams Preset for *Free*, simply scroll down to the bottom of this page and subscribe to our Newsletter! Once you are subscribed, you will receive an email with a Code to download the Travel Dreams Preset at no cost. Hope you enjoy!
Any questions on presets or photo editing? Leave them in the comments below!